Create a Team Member
Access
Required User Role: Corporate Administrator
Availability: Default functionality
You can add Team Members to a Team in Visa Commercial Pay Control.
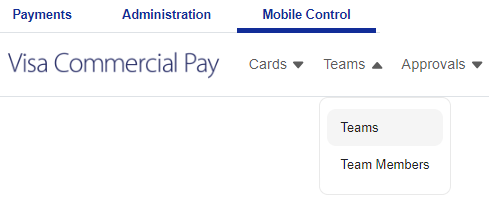
From the navigation bar, click Teams and then select Teams from the dropdown.
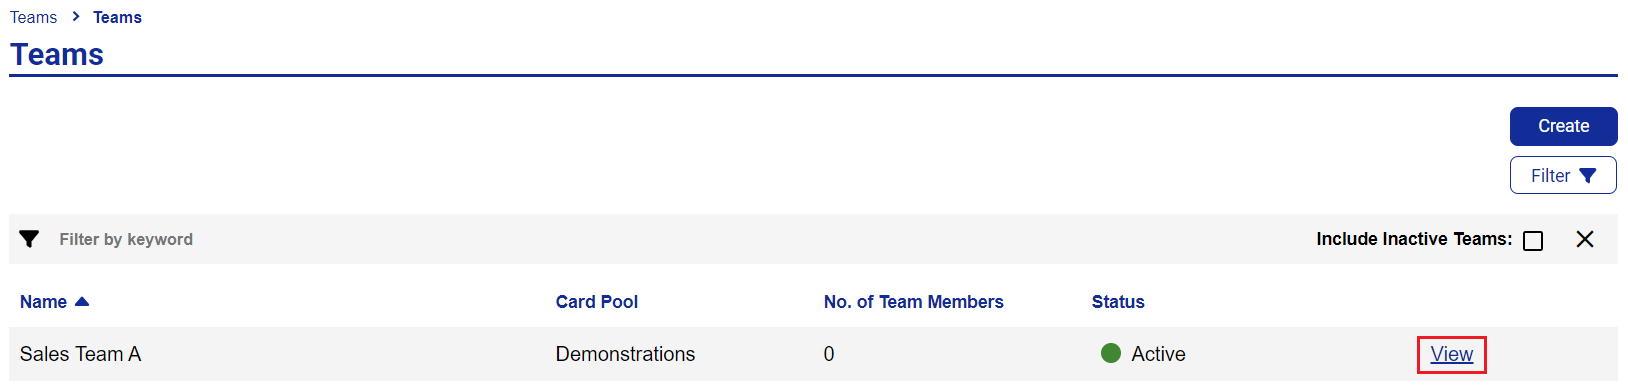
Select a Team.
Scroll down the page to the Team Members section and click Add Team Member.

Enter the following information:
Email Address (Mandatory)—the email address used during registration for the Team Member
Activation Date (Optional)—a date (operating in UTC/GMT) when the Team Member can access the Team. This can be left blank, which will grant to end user immediate access once they are registered
Deactivation Date (Optional)—a date (operating in UTC/GMT) when the Team Member will no longer be able to view any of the associated Team data within the app. This includes viewing any past cards, or creating new cards. You can also use this field to deactivate users at any time by setting the date in the past
Approval Band (Mandatory)—a selection of Approval Bands that can be assigned to the Team Member
Send Email Invite (Optional)—if the Team Member is not yet registered for the app, Visa Commercial Pay will send an email to the email address provided, inviting them to register
Team Administrator (Optional)—apply this to grant the Team Member additional privileges within the Visa Commercial Pay App
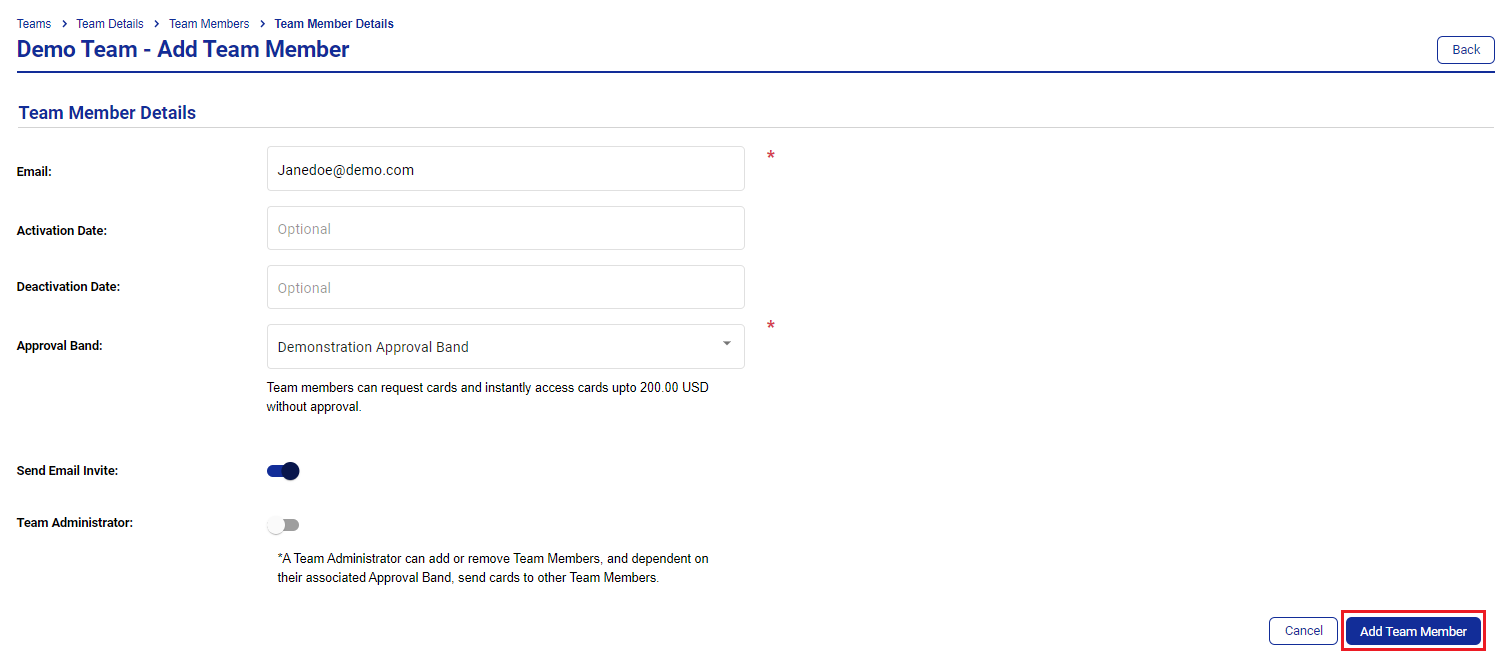
Click Add Team Member.
Welcome Email - Self-Registration
Team Member's that aren't already registered will receive an email asking them to register for the app. They can register by following the link to the Visa Commercial Pay App registration site.
Registration site: https://app.commercialpay.visa.com/
Dependent on the Team configuration, Visa Commercial Pay may also prompt for additional profile level Custom Data Fields that can be associated to the Team Member. For instance, if a cost center or employee ID needs to be captured at this level, it can be configured here.
If the Team Member details entered are successfully matched to an existing Visa Commercial Pay App user, a notification is sent to the Team Member confirming they have been added to a new Team.
Whenever a Team Member is added to a Team, all Corporate Administrators are notified by email.
User Roles
Role | Function | Use case |
|---|---|---|
Corporate Administrator | Used to set up the mobile workflow and send cards. | Finance want to send a card for $10,000 to HR for a license fee. |
Corporate Administrator Approver | Used to approve users to teams, approval bands, spend review groups and cards. A maker-checker function. | Finance want to send a card for $20,000 but they want it to be approved first by someone else in the company. HR want to approve team members before they can join a team in the App. |
Team Administrator | App only: Used to manage teams and send cards to team members. | The head of HR wants to send a $300 card to an interviewee so that they can pay for transport and expenses during the interview process. |
Team Member | App only: Used by anyone wanting to receive, request or create cards. | An employee needs to travel overseas for a sales conference but they don't have a corporate card. They are sent either a virtual card that they can add to their digital wallet to pay for expenses or an online card that they can use to make payments online. |
Reset a Team Member's Credentials
Corporate Administrators can reset a Team Member's credentials directly within Visa Commercial Pay Control.
Search for and select a Team Member. From the Team Member page, click Actions and then click Reset security details.
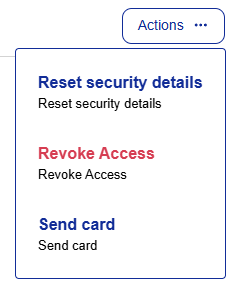
Select one of the options displayed and click Reset.
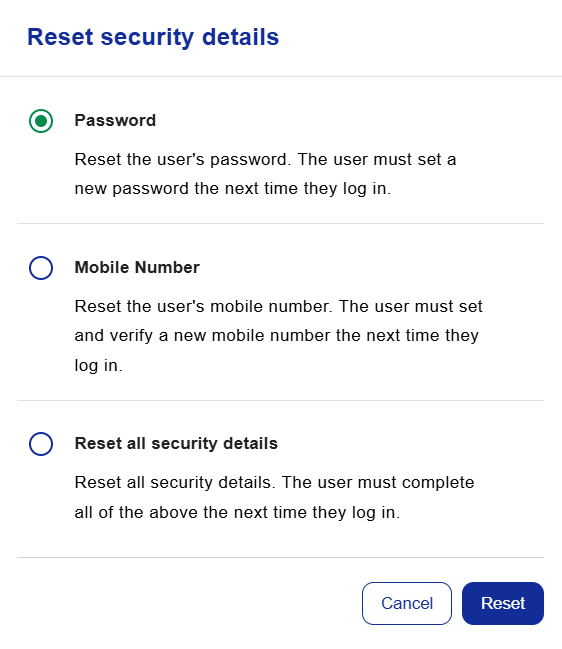
The following details can be reset:
Password
Mobile Number
All of the above (full reset)
Team Members will receive an email notification containing a link to reset the relevant details. If the mobile number is reset, the user will be required to enter and verify a new mobile number the next time that they log into the Visa Commercial Pay App.
Search for a Team Member
You can search for a Team Member by Team, email address and/or Approval Band.
You can also toggle to include inactive Team Members.
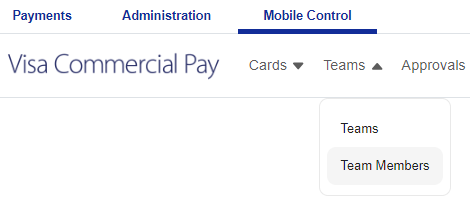
From the navigation bar, click Teams and then click Team Members.
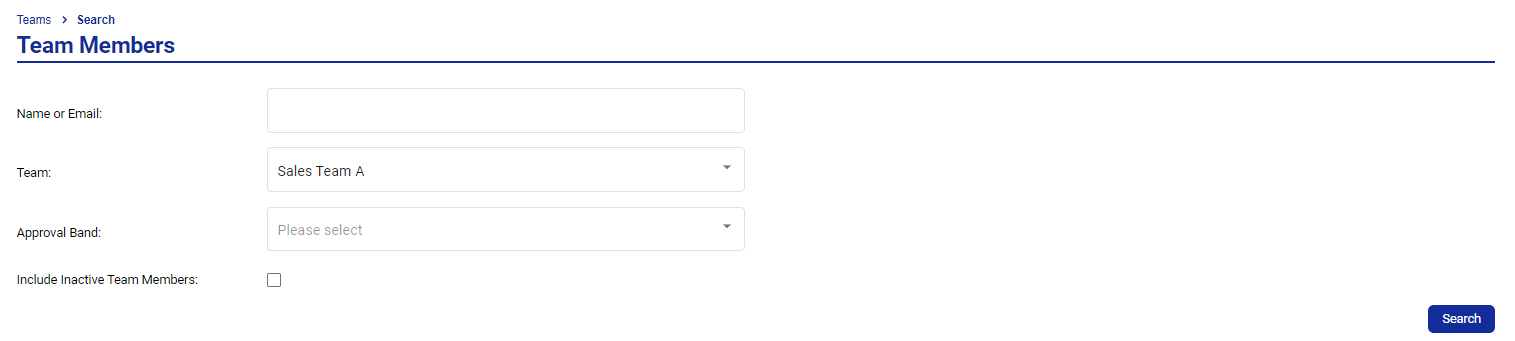
Complete at least one of the following:
Name or Email
Team
Approval Band
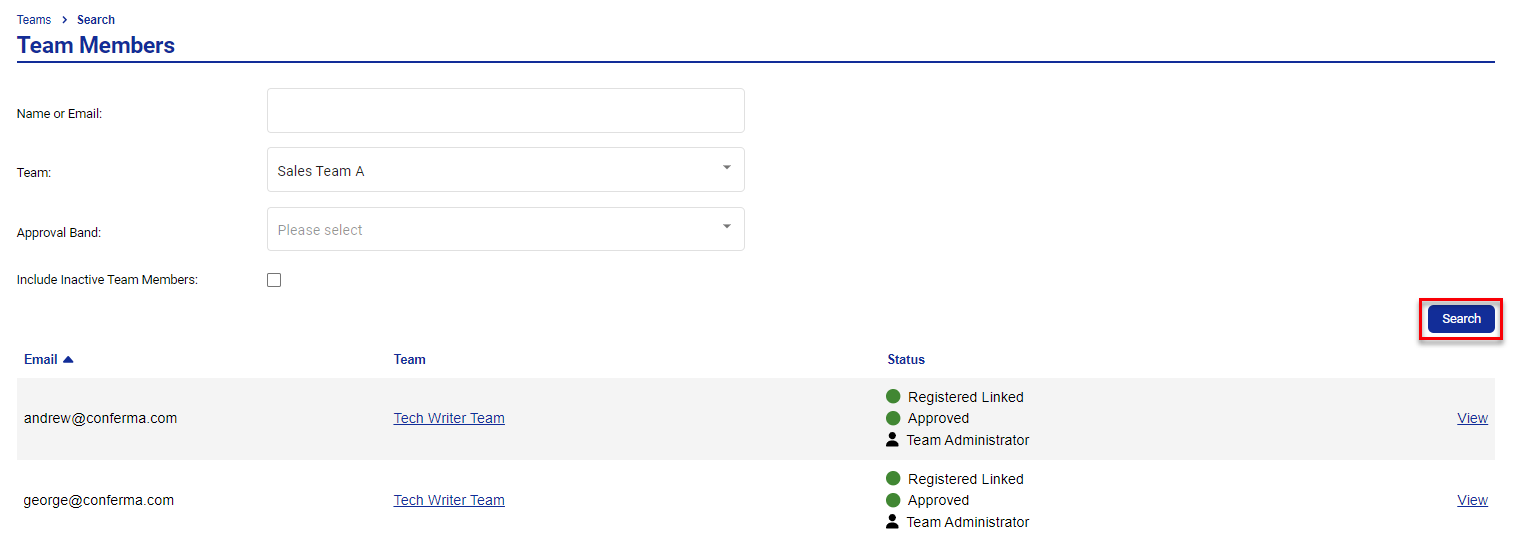
Click Search to view your results.
Bulk Load Users
If you have a large number of Team Members to add, Visa Commercial Pay Control allows you to bulk upload users rather than adding them all individually.
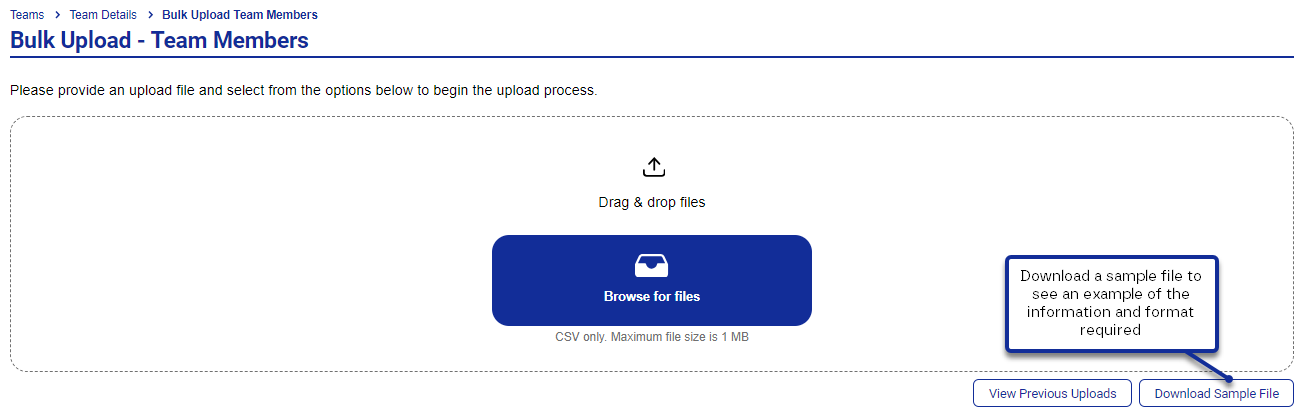
To do this, you need to provide a CSV file with a maximum of 1000 rows (maximum of 1000 Team Members per file). The file itself can have its data columns in any order, and can contain additional non-relevant columns. You can download a sample file for Bulk Uploading Team Members that contains examples of the fields and information that should be included.
Caution
Do not include any apostrophes (') or commas (,) when preparing your CSV file for upload. If any apostrophes or commas are used on the CSV file that is uploaded, the file will fail to upload.
The standard fields the file can contain are:
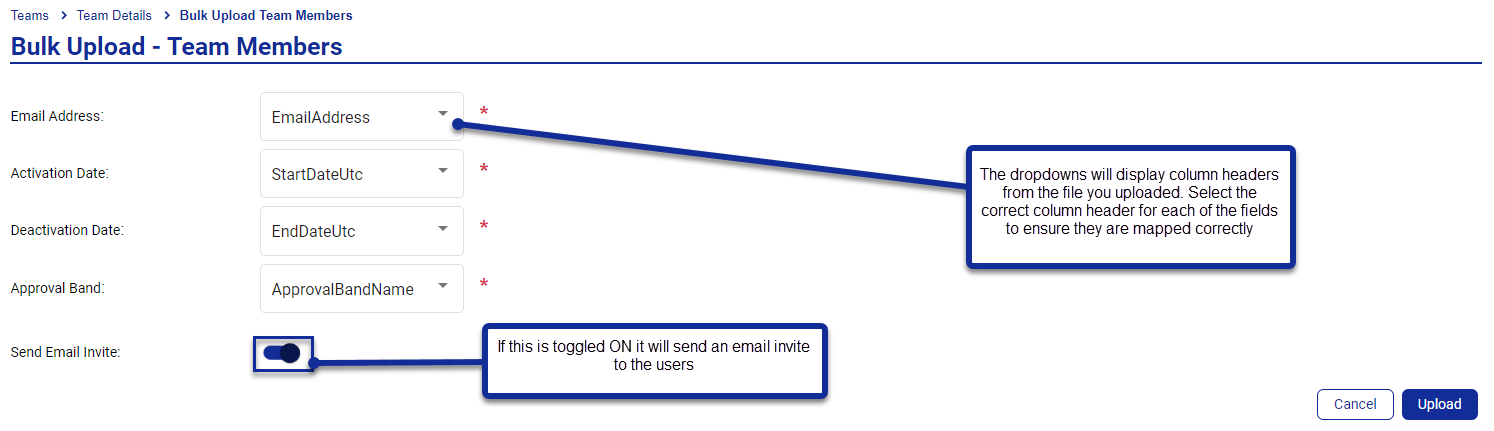
Email Address (Mandatory)
Activation Date (Optional)
Deactivation Date (Optional)
Approval Band name (Optional)
The file may also contain additional columns reflecting the custom data fields that need to be captured for the user, such as Employee ID. These should be ordered alphabetically.
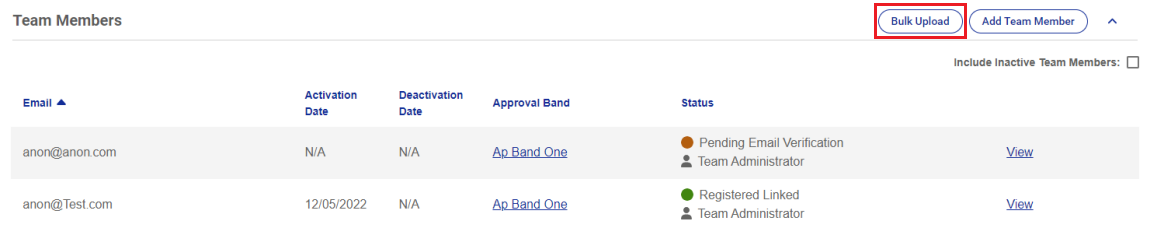
Select a Team and scroll to the Team Members section.
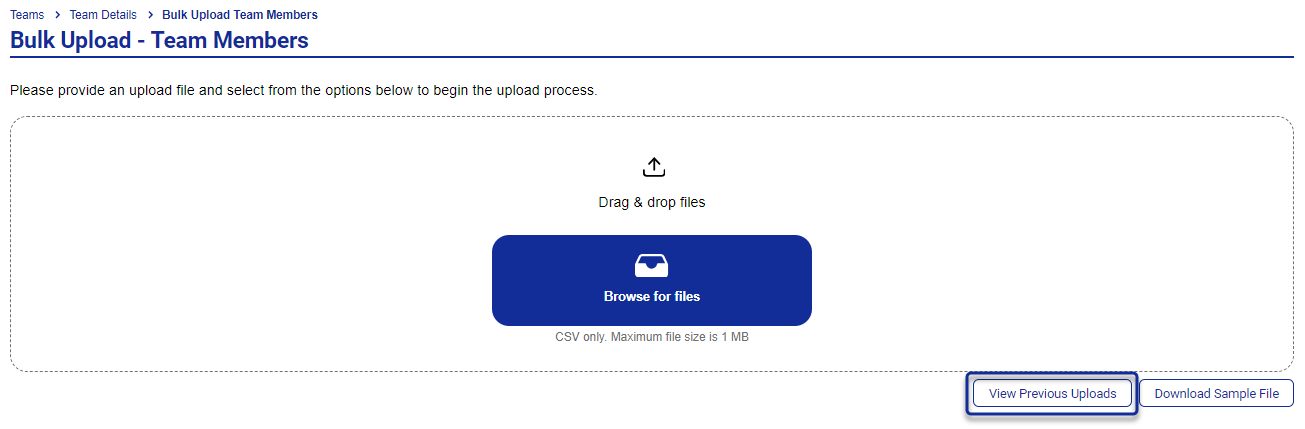
Click Bulk Upload.
Drag and drop your file or click Browse for files and select your CSV file.
The top row of the file should contain column headers.
Complete the column mapping and click Upload.
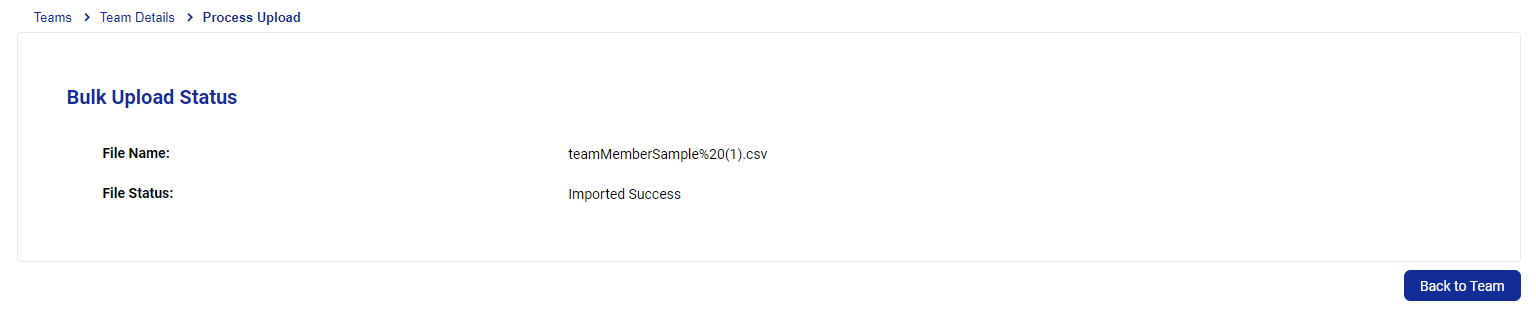
The file will be processed and Team Members will be matched with end users where possible.
All Corporate Administrators will receive an email notifying them of the additional Team Members.
Viewing Previous or Processing Bulk Uploads
From the Bulk Upload page, click View Previous Uploads.
You can view any previous uploads and their status.
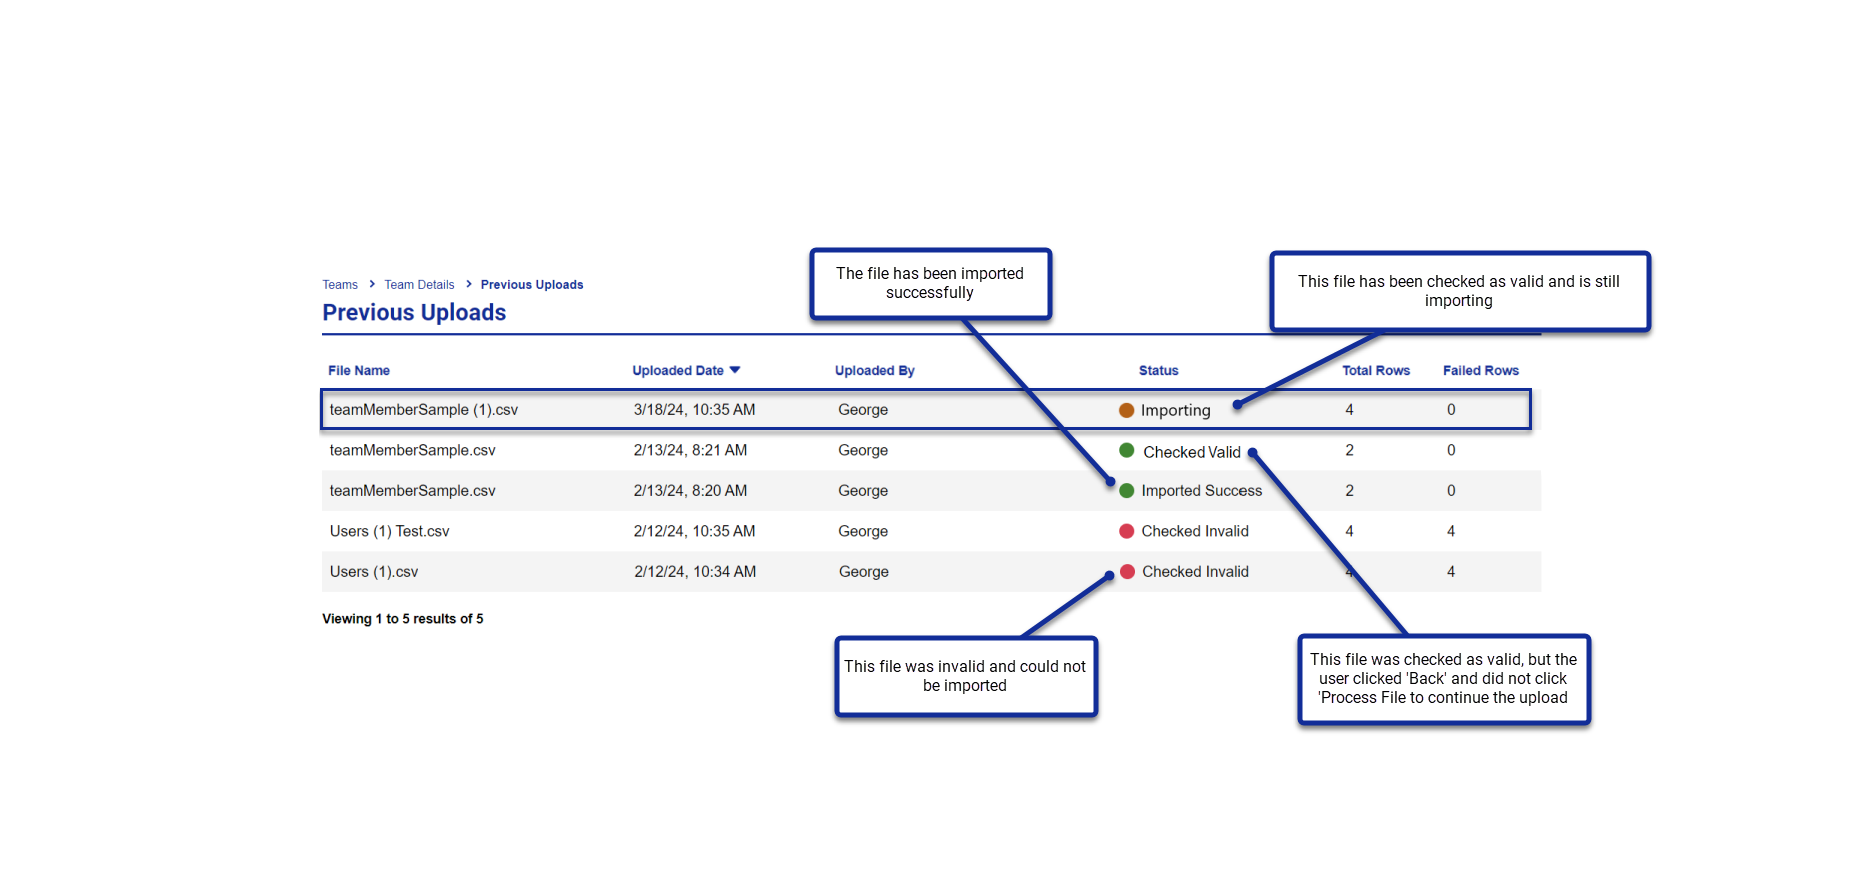
Click into an upload to view the Parsed Result. If the file was checked valid but you did not continue to process the file, you can continue to process the file from here. For Invalid files or files already Imported, the Process File button will be grayed-out.
Troubleshooting Bulk Upload
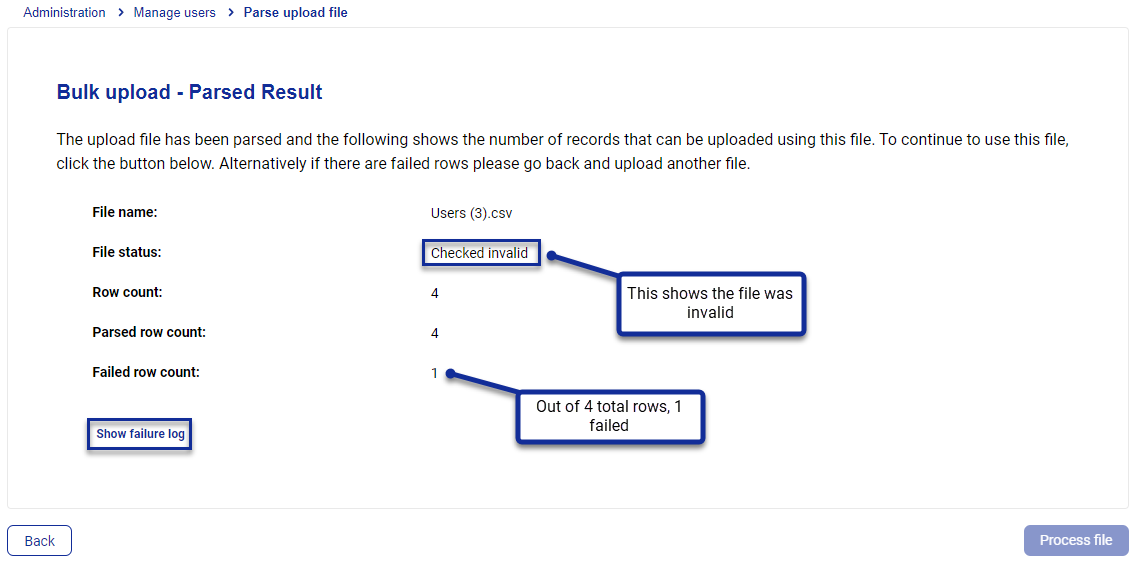
If the file cannot be processed correctly, the Process File button will be grayed-out and the Parsed Result information will show that the file was not valid.
The results will show that the file was invalid, and/or how many rows could not be parsed. Click Show Failure Log to view more details.
The Failure Log will display below the Parsed Result information. The Severity column indicates how serious the failure is. An Error will prevent the file being processed. 'Info' entries do not block the file being processed.
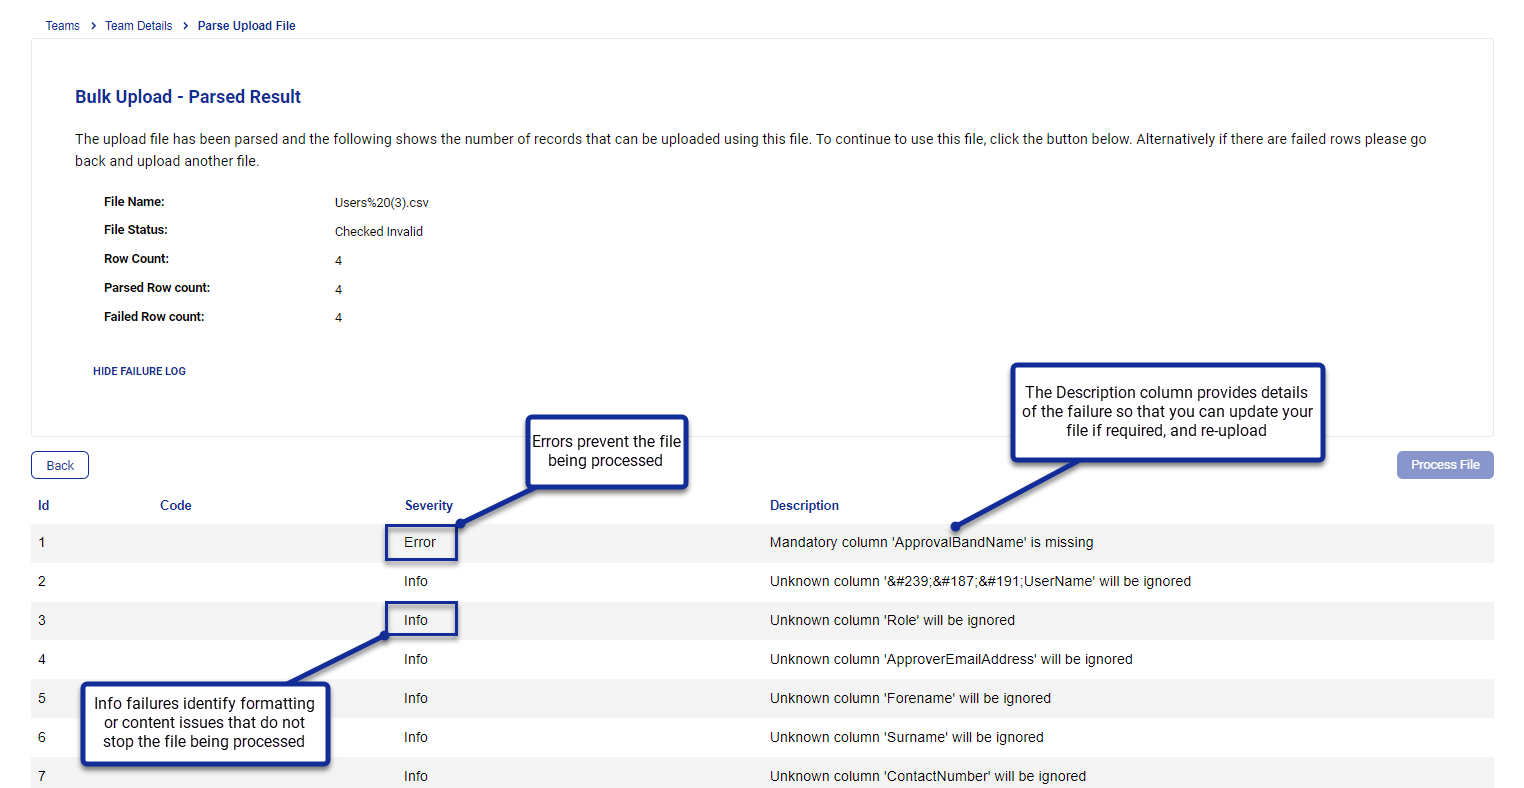
If the Failure Log only contains 'Info' entries, and you do not want to re-upload an updated file, you can click Process File. If the Failure Log contains Error entries, you will need to re-upload a new file with these errors corrected.
Click Back to re-upload the file.
Multiple Users Found
When a Team Member is created, an automatic link is attempted between existing user records on all Visa Commercial Pay platforms and the Team Member's email address.
If there is more than one user with that email address across all platforms, an automatic link cannot be created. The Corporate Administrator will be prompted to manually select which user record to link to the Team Member.
When linking a user to a Team, you have the ability to click 'Link User' from a list of users where the same email address is matched to multiple verified user accounts.
Click Link User on the team member that displays the prompt.

Click Select on the user that you want to link the team member to.

Click Confirm to complete the process.
