Visa Commercial Pay Online v3.21 Release Notes
Visa Commercial Pay Online v3.21 introduces a new Instant Supplier Payment integration powered by Cybersource.
Instant Supplier Payment Integration powered by Cybersource
Instant Supplier Payment is a payment gateway specialising in secure payment processing and automated fraud protection. Users will have the ability to set up suppliers in Visa Commercial Pay Online that integrate with Instant Supplier Payment. This functionality is available to all users within Supplier Management that are able to set up suppliers in Visa Commercial Pay Online where the issuer supports it.
Once a supplier has been created and integrated with Instant Supplier Payment, the buyer will be able to initiate a payment via the Pay a Supplier functionality in Visa Commercial Pay Online.
We have enhanced the UI of Visa Commercial Pay Online to support additional supplier payment methods and buyer configurations.
We are introducing the Instant Supplier Payment integration to provide the following functionality for Visa Commercial Pay users:
Automate supplier payments
Increase payment acceptance
Reduce exposure of card details to the supplier
Allow Corporate Administrators to enter merchant details
Allow an email link to be sent to the supplier to capture merchant details
Allow users to email a remittance notification to a supplier
Creating a Supplier with Instant Supplier Payment
Buyers can create suppliers using the Instant Supplier Payment integration by sending a request to the supplier. The supplier will receive a notification that will provide them one-time access to Visa Commercial Pay Online to allow them to set up their details. Once they have been approved, the supplier will be boarded and the information will be sent to Instant Supplier Payment.
From the navigation bar, click More and then from the dropdown click Supplier management.

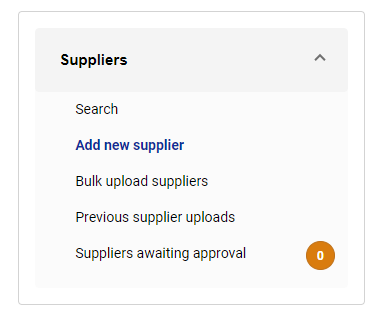
Click Add new supplier from the left-hand panel.
Complete the following mandatory fields:
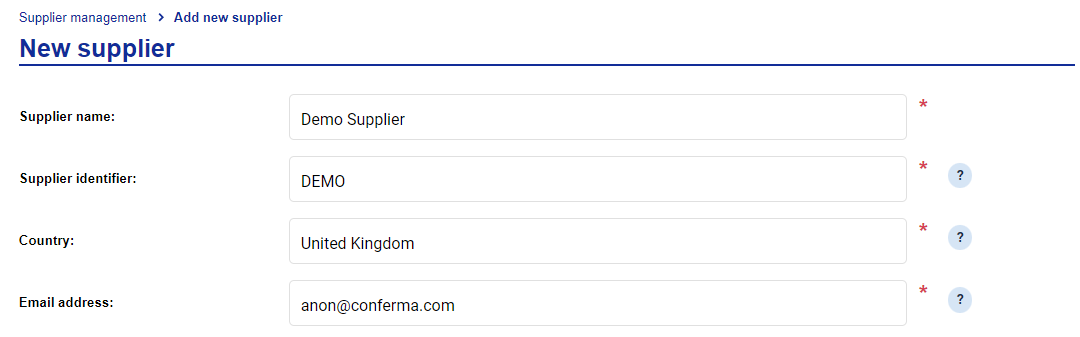
Supplier name
Supplier identifier
Country
Email address
Enter the suppliers contact information. These fields are not mandatory.
From the Payment provider field, select Cybersource and then click Continue set up.

If you want to control the account, set the toggle to Yes and then click Next. If you want the supplier to control their own account, skip to step 7.
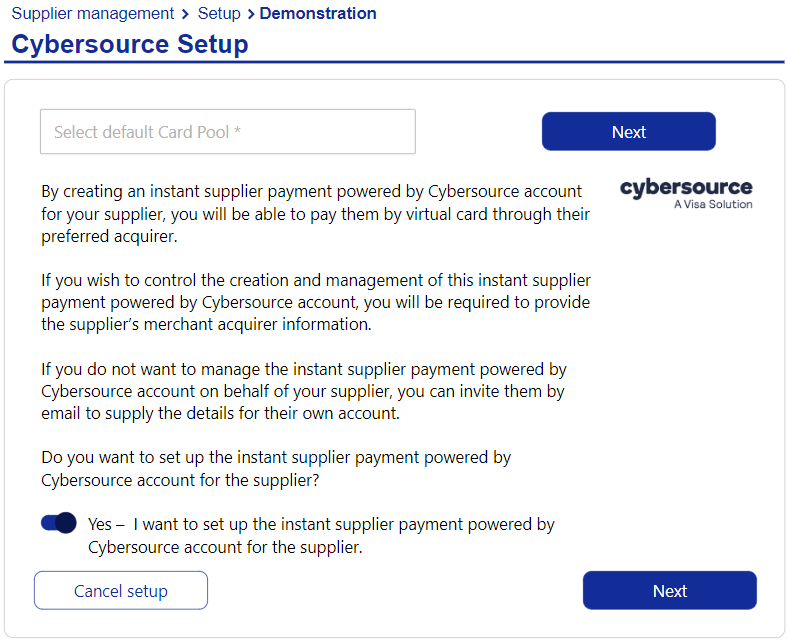
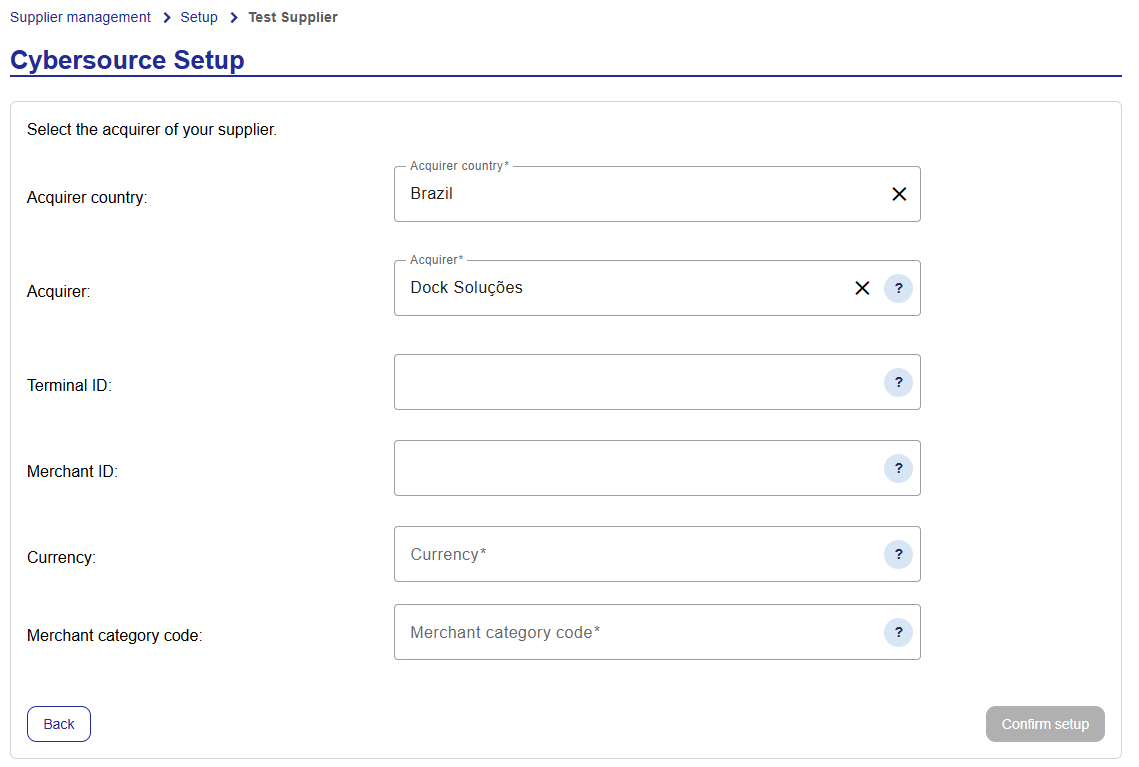
Select an acquirer from the Acquirer dropdown and then complete the following mandatory fields:
 UI Tool Tips
Acquirer—Instant Supplier Payment will require additional details of your supplier's business or personal information about their employees. This data will be used to perform the required checks in order to operate an account and facilitate payments to the supplier.
Terminal ID—An alphanumeric identifier used to track the terminal used to process a transaction. Located on the supplier's transaction receipts.
Merchant ID—An alphanumeric identifier used to identify the supplier's merchant account. Located the supplier's merchant account statement.
Currency—The account primary currency.
Merchant category code—The 3-4 digit merchant category code associated with the suppliers business.
Click Confirm setup.
You will be redirected to the supplier details. If a supplier requires approval, there will be a message on the screen stating "this supplier is awaiting approval". Suppliers can be approved by another corporate admin user.
If you want the supplier to control their own account, set the toggle to No and then click Next.
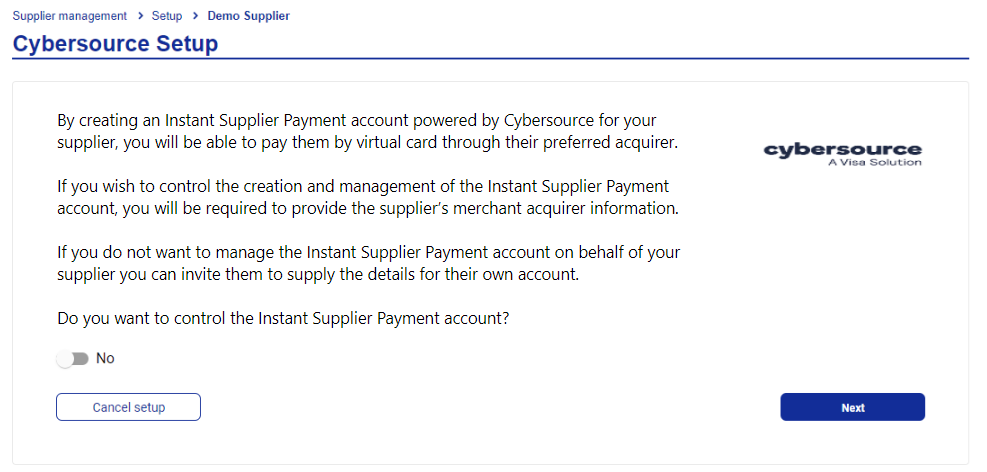
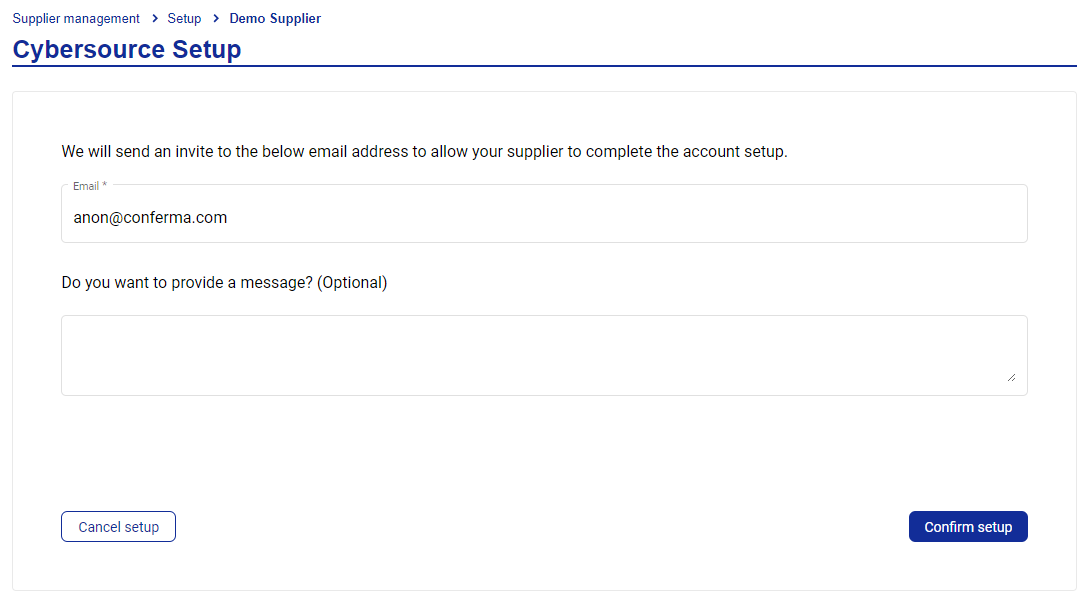
Ensure that the email address is correct and enter a message if required. Click Confirm set up.
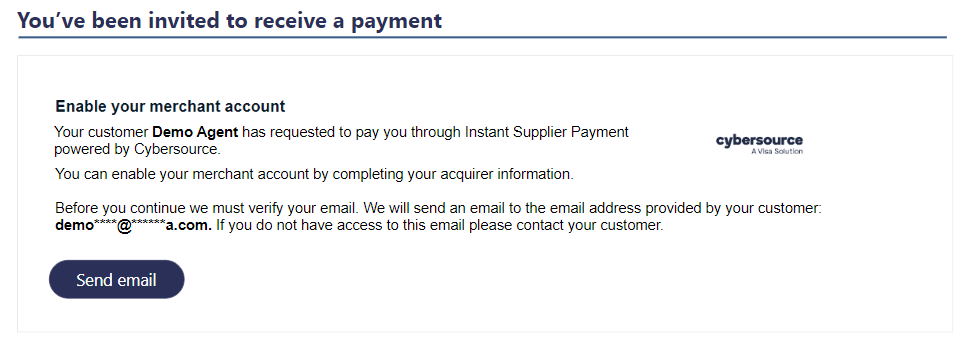
The user will receive an email with a one-time access link to Visa Commercial Pay Online prompting them to verify their email address. The user must click Send email to continue.
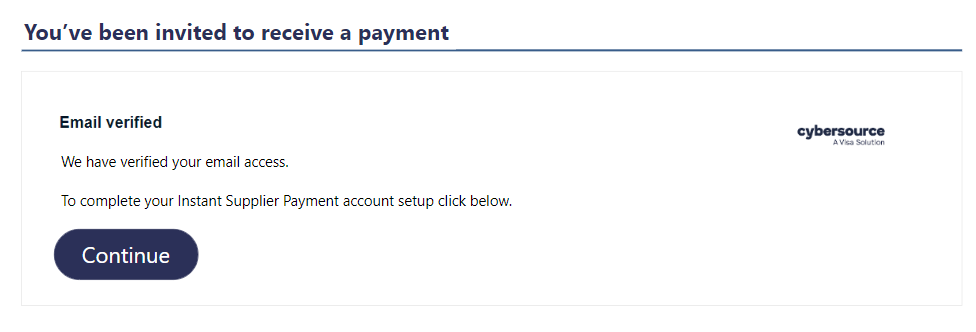
The user will receive a second email with another link. If the user clicks the link, the email address will be verified. The user must then click Continue.
The user must select an acquirer from the Acquirer dropdown and then complete the following mandatory fields:
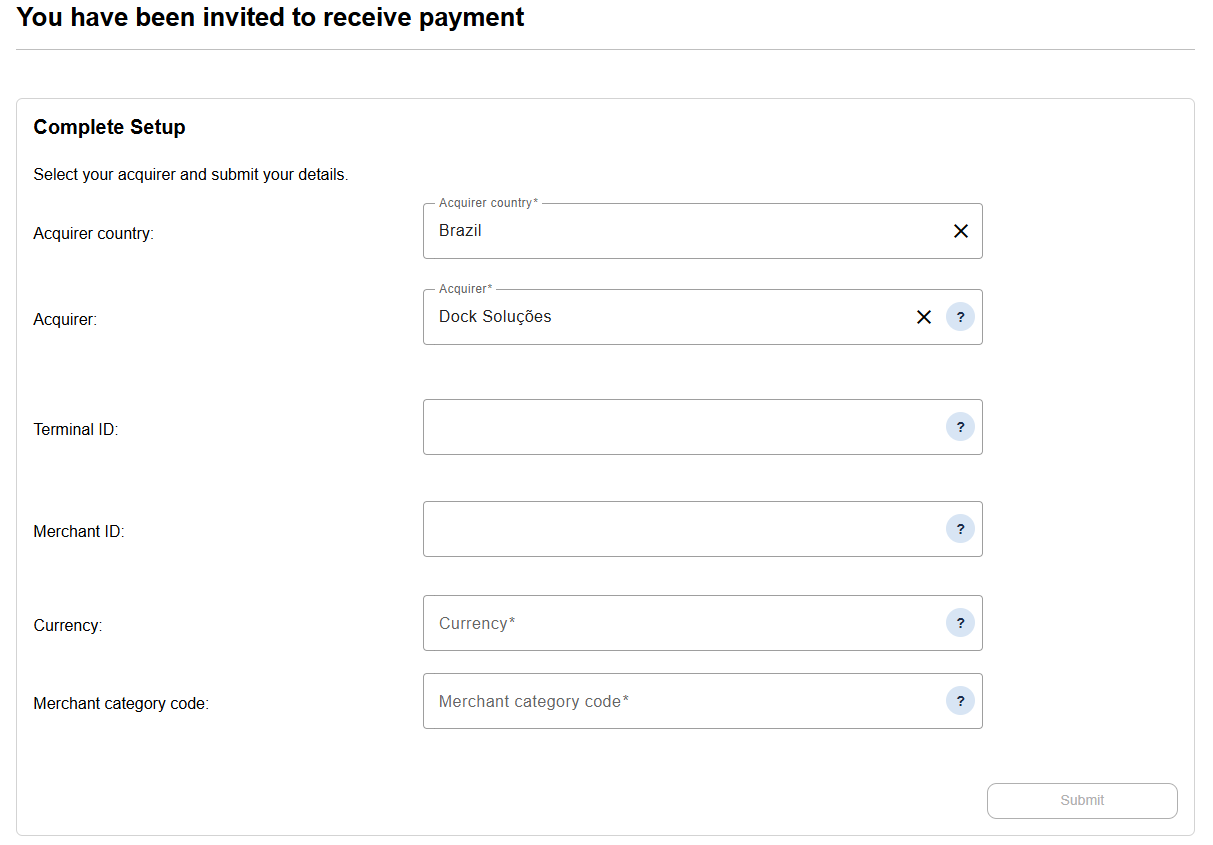 UI Tool Tips
Acquirer—The financial institution that will process the card payments. Transaction fees will be applied and charged at the point of payment.
Terminal ID—An alphanumeric identifier used to track the terminal used to process a transaction. Located on the supplier's transaction receipts.
Merchant ID—An alphanumeric identifier used to identify the supplier's merchant account. Located the supplier's merchant account statement.
Currency—The account primary currency.
Merchant category code—The 3-4 digit category code associated with the merchant type.
The user must then click Submit. The set up will be complete and the Instant Supplier Payment account will be connected.
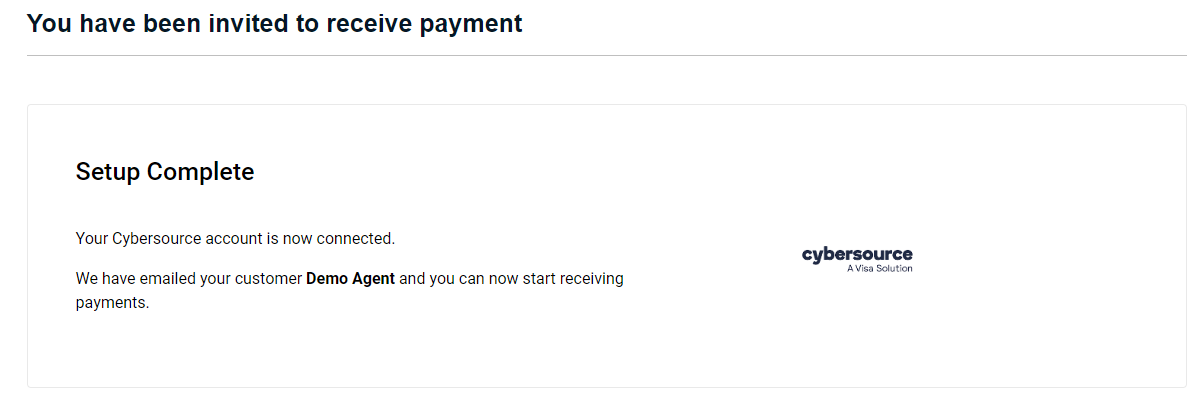
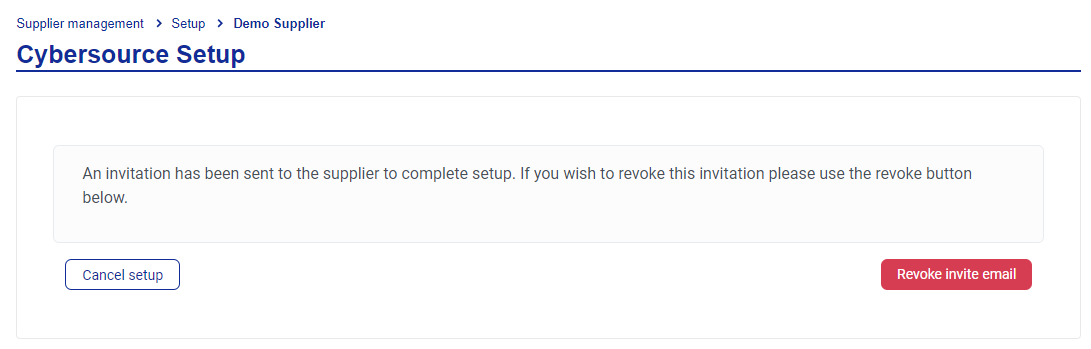
The one-time access invite can be revoked.
Click More and then click Supplier management. From the left-hand panel, click Search.
Search for the supplier using the search criteria.
Select the supplier and then scroll to Payment method options and click Setup required alongside the Instant Supplier Payment row.
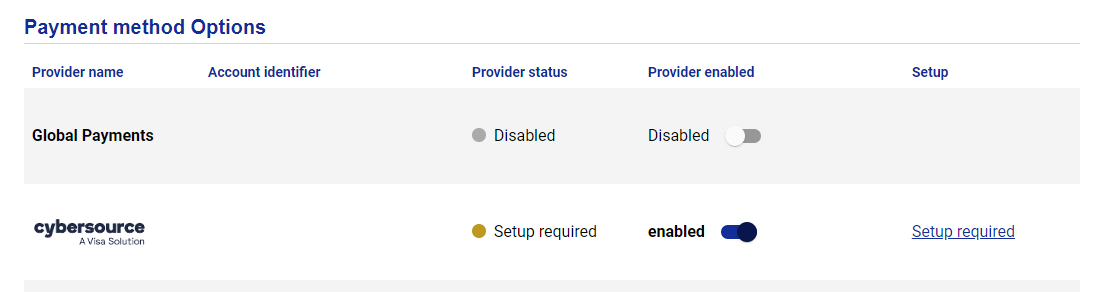
Click Revoke invite email. The email that was previously sent to the supplier will no longer be valid.
Creating a Payment with Instant Supplier Payment
Buyers can create payments to suppliers set up with Instant Supplier Payment. All card details and payment data is exchanged securely via the Cybersource API. Once a payment has been processed, the buyer will receive a notification.
From the navigation bar, click Pay a supplier.
Select a Supplier that has been connected to Instant Supplier Payment.
Select the Card Pool that you want the payment to be created from and enter the following:
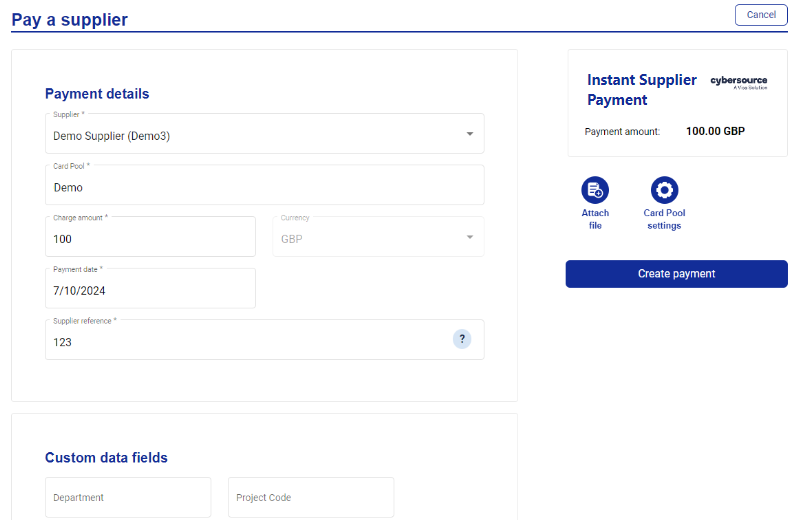
Charge amount
Currency
Payment date
Supplier reference
Click Create payment. You will be redirected to the card deployment screen for the supplier payment.
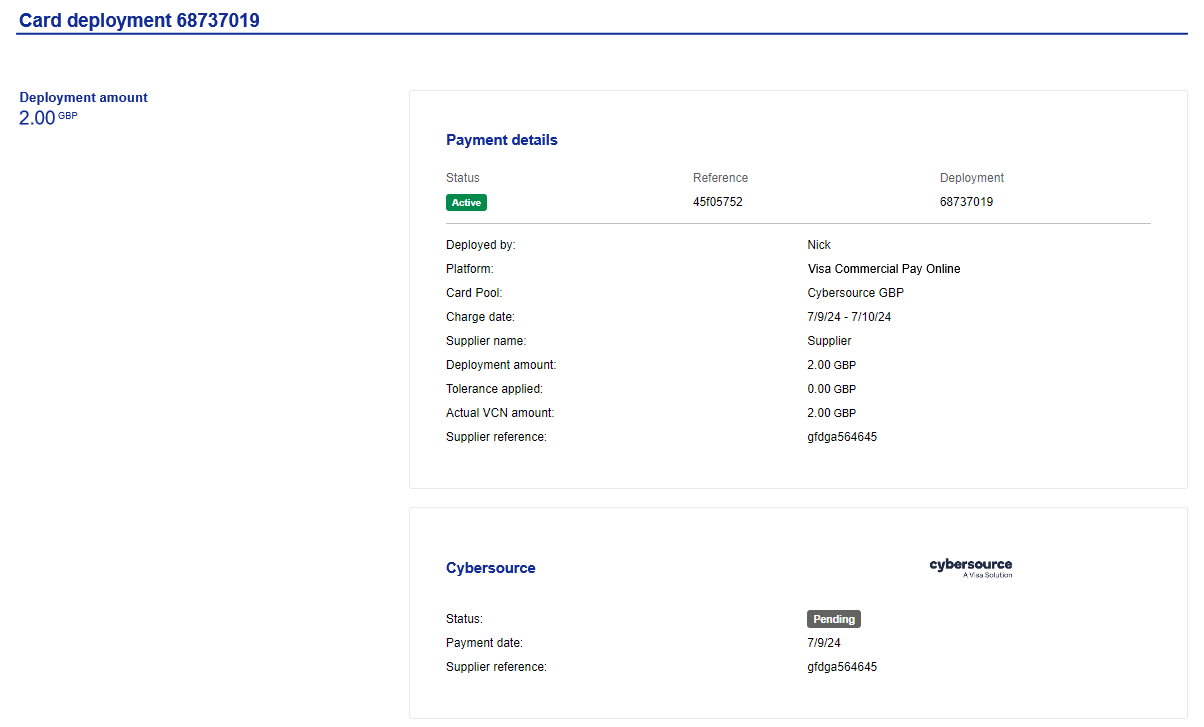
If an Instant Supplier Payment payment has been successful, both the Buyer and the Supplier will receive an email containing confirmation of the payment. If an Instant Supplier Payment payment has been unsuccessful, only the Buyer will receive an email containing the failure notification.
Note
Custom data fields and advanced card controls that are linked to the Card Pool will be captured against cards that are deployed via Instant Supplier Payment.
Approving a Supplier with Instant Supplier Payment
To approve a supplier that has been connected to Instant Supplier Payment:
Click More and then click Supplier management.
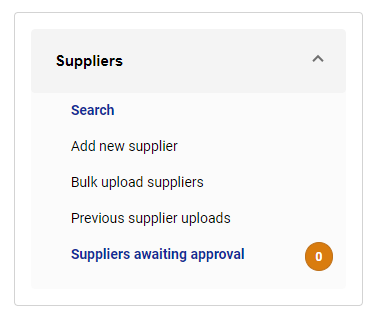
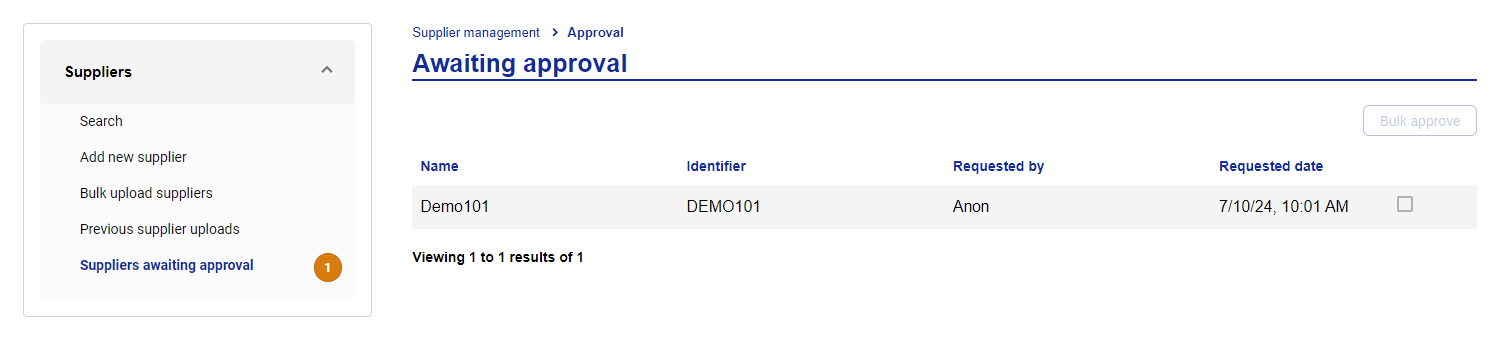
From the left-hand panel, click Suppliers awaiting approval.
All suppliers awaiting approval will be listed. To approve the supplier select the tick box alongside the supplier and click Bulk approve.
Troubleshooting and Errors
Troubleshooting and errors that can occur within the Instant Supplier Payment workflow will be detailed in the User Guide upon Live release.
Notable Bug Fixes
We have fixed an issue that prevented users from being able to copy custom data fields.
We have fixed an issue where the deployment search functionality did not work correctly when entering Japanese text.
We have fixed an issue where advanced card control labels were not translated when configuring an ACC template.
We have fixed an issue that prevented approval delegations from being added correctly after the delegation details had been set up.
We have made improvements to the Chinese (Hong Kong) and Chinese (Taiwan) translations.
We have fixed an issue where the reset security details button was sometimes not visible.